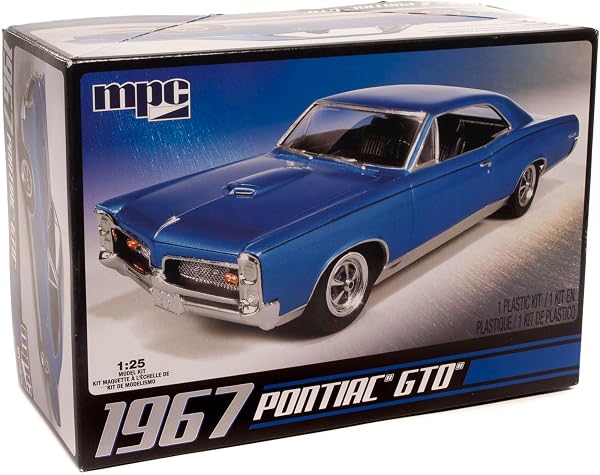
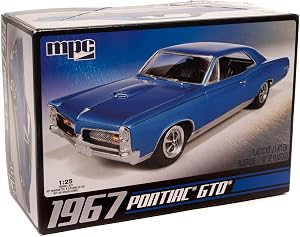
MPC 1967 Pontiac
9.0Editor score1:25 scale replica
Skill level 2
85-plus parts
Optional supercharger
Find the right plastic model kits for 2026. We compare 8 standout options by build quality, useful features, owner feedback, value, and everyday trade-offs.
Find the right plastic model kits for your skill level and interests in 2026. We compare 8 standout options by the factors that matter most in this hobby, including scale accuracy, parts count, assembly method, surface detail, decal quality, subject variety, and overall value for builders of every experience level.
Plastic model kits range from simple snap-fit projects that come together in an afternoon to complex multi-hundred-piece builds requiring glue, paint, and patience. The biggest differences between kits come down to tooling precision, subject fidelity, and how much finishing work you are willing to do.
This guide breaks down each kit by practical building considerations so you can match a project to your workspace, schedule, and display goals. Whether you are returning to the hobby after years away or opening your first box, the comparisons below should help you choose with confidence.
We compared 8 plastic model kits and related building accessories using the details that actually help a buyer decide: scale accuracy, parts count, skill level rating, assembly method, surface detail quality, decal options, subject authenticity, included accessories, and overall value. The notes focus on practical trade-offs so each pick connects to how builders actually plan, assemble, finish, and display their completed models.


Compare key features, scores, and current prices side by side. A shorter feature list means fewer details were available, not necessarily fewer capabilities.





While this is not a plastic model kit in the traditional sense, the Fippy 11-piece tool set earns a spot in this guide because nearly every glued kit on this list requires basic hand tools for sprue removal, seam cleanup, and decal placement. Having a dedicated hobby tool kit on hand before you open your first box of parts can make the difference between a frustrating afternoon and a satisfying build session.
We may earn a commission when you buy through this link, at no additional cost to you.
The set includes carbon steel side pliers for cutting parts from runners, two tweezers for handling tiny decals and photo-etched pieces, a flat file and dual-sided polishing sticks for smoothing gate marks, a craft cutter with a replacement blade, a small ruler, a model separator, and a microfiber cloth. The side pliers are the standout piece here, since clean sprue cuts reduce the amount of sanding you need to do later and help preserve fine surface detail on fuselage panels or car body curves.
Everything packs into a small plastic storage case that fits easily in a desk drawer or hobby bag. The tools are lightweight and sized for precision work rather than heavy-duty cutting, which suits the delicate nature of 1:72 aircraft parts or 1:25 car interior components. The craft cutter comes with a safety cap, a small but welcome detail if you share a workspace with younger builders or store the kit in a shared craft area.
As your builds become more detailed, you may find the polishing sticks wearing out faster than expected on harder styrene or resin parts. At that point, investing in a dedicated glass file or a set of micro-mesh sanding pads will give you a smoother finish on visible surfaces like aircraft canopies or car hoods. The Fippy set remains useful as a travel or secondary kit even after you upgrade individual tools.
If you are buying your first plastic model kit and do not already own hobby nippers or tweezers, adding this set to your cart is a practical move. It will not replace higher-end tools like a dedicated single-blade flush cutter or a glass file, but it covers the essentials at a price that leaves plenty of budget for the actual model and a few paint colors.
Builders who already own a full set of hobby nippers, files, and precision tweezers will find this kit redundant.
We may earn a commission when you buy through this link, at no additional cost to you.
The MPC 1967 Pontiac GTO is one of the most accessible entry points into classic car modeling. Rated at skill level 2 with roughly 85 parts, it gives newer builders enough detail to feel rewarding without the overwhelming complexity of a 200-piece show-car kit. The subject matter is a genuine American icon, and the finished model captures the proportions and stance that made the GTO a legend on the street and the strip.

We may earn a commission when you buy through this link, at no additional cost to you.
Under the hood, the kit reproduces the 400 cubic inch V8 engine that defined the GTO’s performance reputation. The engine bay detail is above average for a skill-level-2 kit, and the optional supercharger piece lets you customize the build to represent a stock cruiser or a modified muscle car. The interior includes bucket seats and a floor-mounted shifter with a center console, which adds visual interest when the model is viewed through the side windows.
Separate rear suspension and exhaust components add realism to the undercarriage, though these smaller assemblies may require a bit more patience during alignment than a one-piece chassis plate would. The instructions are clearly laid out, which matters more than many experienced builders remember, since confusing step sequences are one of the most common reasons newer modelers abandon a project halfway through.
Because the body is molded in blue, you can display the car as-is if the color suits your taste. However, if you want a different shade or a two-tone finish, a light sanding with fine-grit paper followed by a primer coat will help new paint adhere to the existing molded color. Starting with a light-colored primer is especially important if you plan to paint the body white, yellow, or another bright hue.
This kit is a strong choice for anyone who wants a recognizable classic car on their shelf without committing to months of detailing work. The relatively low parts count means you can realistically finish the build in a few weekends, and the optional supercharger gives you a small but meaningful customization decision that makes the project feel more personal.
Advanced modelers who expect photo-etched parts, separate body panels, or full engine wiring detail will find this kit too simplified.
We may earn a commission when you buy through this link, at no additional cost to you.
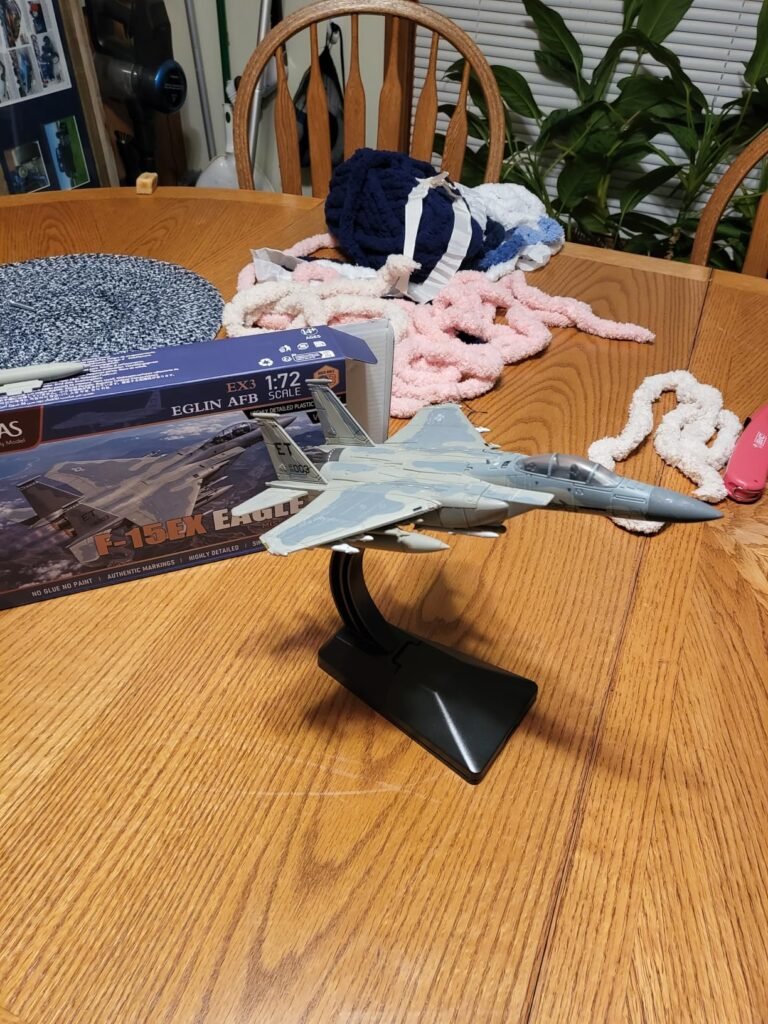
The SEBUNAS A-10 Thunderbolt II takes a different approach from the traditional glued-and-painted kits elsewhere in this guide. With only 43 pieces and a fully snap-fit assembly system, it is designed to come together in a single sitting without any adhesive, paint, or specialized tools. That makes it an appealing option for younger builders, casual hobbyists, or anyone who wants a recognizable warbird on their desk without a multi-week commitment.
We may earn a commission when you buy through this link, at no additional cost to you.
Despite the simplified construction, the kit captures the A-10’s most distinctive features: the straight wings, the twin engines mounted high on the rear fuselage, and the unmistakable GAU-8 Avenger cannon nestled in the nose. Raised panel lines add visual texture to the fuselage and wing surfaces, and the movable control surfaces give the finished model a more dynamic look than a static one-piece casting would.
The ABS plastic construction is noticeably tougher than the polystyrene used in most traditional model kits. This means the finished A-10 can survive being picked up, repositioned on a shelf, or handled during show-and-tell without the risk of snapping a pitot tube or cracking a tail fin. The tradeoff is that ABS does not accept conventional model cement or standard acrylic paints as readily as polystyrene, so customization options are more limited.
Snap-fit kits like this A-10 prioritize speed and accessibility over the seamless finish that glued construction allows. The joints between parts are engineered to click together firmly, but they can leave faint seam lines that would normally be filled and sanded on a traditional build. For display purposes at arm’s length, the difference is minimal, but close-up photography or competition judging will reveal the construction method.
If you are shopping for a gift or want a low-pressure introduction to aircraft modeling, this kit delivers strong value. The numbered part system and illustrated instructions keep the build straightforward, and the result is a displayable replica that looks convincing from a normal viewing distance. Just be aware that experienced modelers who enjoy painting, weathering, and decal work will find the snap-fit format limiting.
Modelers who want to practice advanced painting, weathering, or seam-filling techniques will be better served by a traditional polystyrene kit.
We may earn a commission when you buy through this link, at no additional cost to you.
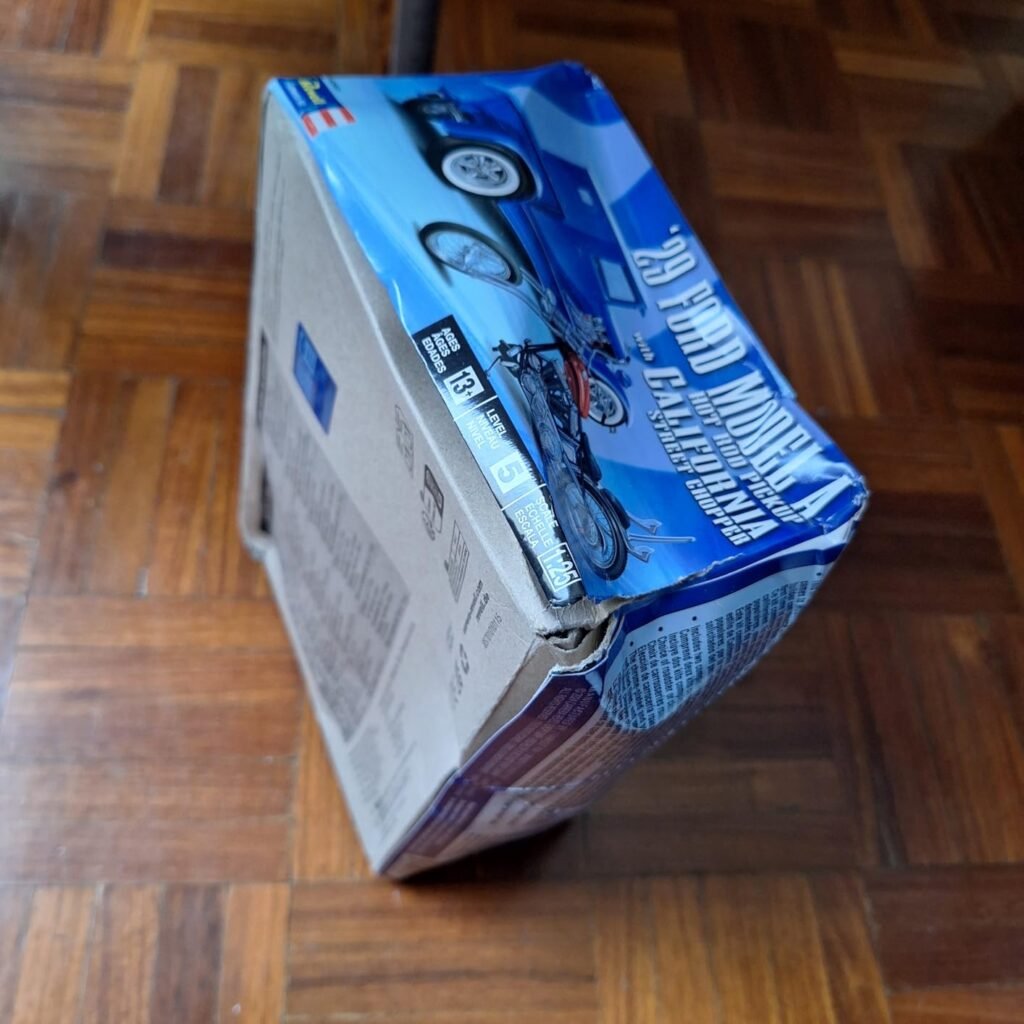
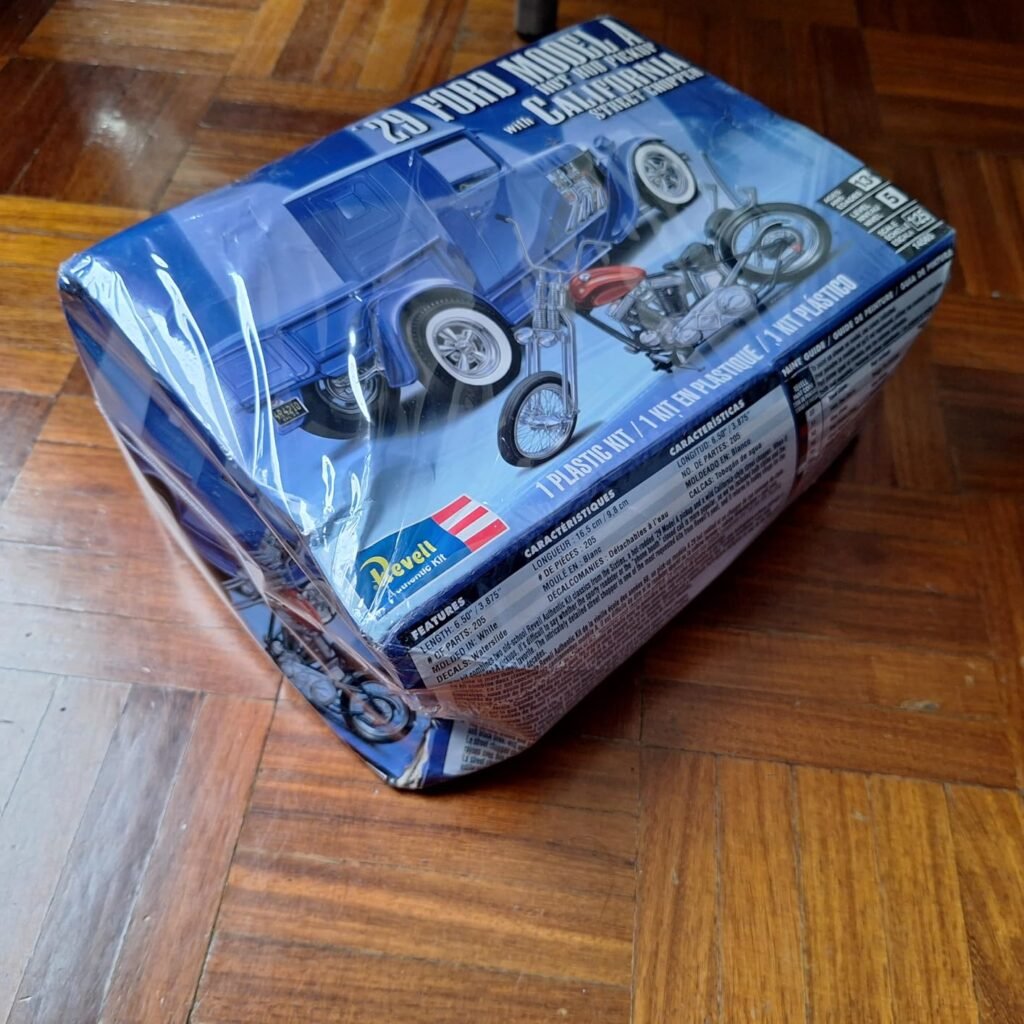
The Revell 1929 Model A Pickup and California Street Chopper kit is the most ambitious offering in this guide, bundling two complete 1:25-scale vehicles into a single box. With 205 parts and a skill level 5 rating, this is a project for experienced modelers who enjoy the process as much as the finished result. The dual-vehicle format also makes it one of the better per-model values on this list, since you effectively get two builds for the price of one.
We may earn a commission when you buy through this link, at no additional cost to you.
The Model A pickup offers a choice between a roadster or closed cab body, a hopped-up four-cylinder engine with vintage speed equipment, and five-spoke mag wheels that give it a hot-rod personality. The street chopper is equally detailed, featuring a separate engine, springer front forks, ape-hanger handlebars, spoke-style wheels with soft black tires, and upswept fishtail exhaust pipes. The chrome-plated parts add a convincing metallic shine to the chopper’s engine and trim pieces.
Building two vehicles from one kit requires careful parts management and a well-organized workspace. The chrome pieces in particular benefit from gentle handling, since aggressive sanding or cement application can damage the plating. Plan your painting sequence before you start, because the white and chrome molded parts will need different finishing approaches depending on the color scheme you have in mind.
When tackling a dual-kit project, it helps to build one vehicle at a time rather than switching back and forth between the two. This reduces the risk of mixing up similar-looking parts and keeps your painting workflow simpler. Label the sprue trees for each vehicle with masking tape before you begin, and store small chrome pieces in a separate container to prevent loss or accidental damage during the first build.
This kit is best suited for modelers who have already completed several simpler builds and are ready to tackle a more involved project. The reward is a pair of highly detailed, period-authentic vehicles that complement each other beautifully on a display shelf. If you are newer to the hobby, consider starting with one of the skill-level-2 kits in this guide and working your way up to this one.
First-time builders or younger modelers who have not yet developed patience for complex multi-step assemblies and delicate chrome parts.
We may earn a commission when you buy through this link, at no additional cost to you.
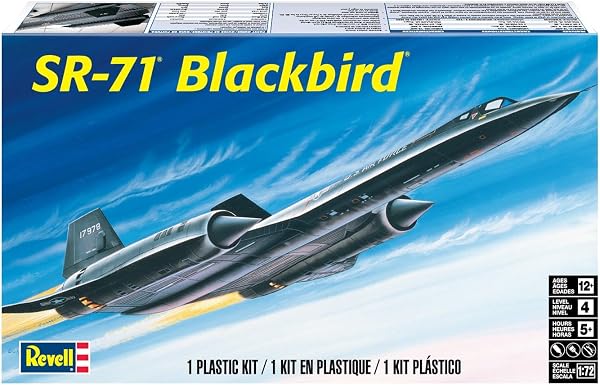
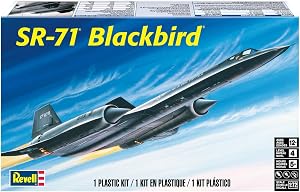
The SR-71 Blackbird is one of the most recognizable aircraft in aviation history, and this Revell 1:72-scale kit does a credible job of capturing its sleek, elongated profile. At skill level 4 with 66 parts, it sits in a comfortable middle ground: detailed enough to reward careful assembly but not so complex that it becomes a months-long commitment. The inclusion of a GTD-21 surveillance drone and its launch cart adds a unique display element that sets this kit apart from standalone aircraft models.

We may earn a commission when you buy through this link, at no additional cost to you.
Surface detail on the fuselage and wing chines is accurate for the scale, with recessed panel lines and subtle raised features that respond well to a wash or dry-brushing technique if you choose to weather the model. The kit is molded in black and clear plastic, which gives the finished Blackbird a convincing base color even before painting. The clear parts cover the cockpit canopy and the drone’s sensor windows.
One practical consideration with black-molded kits is that seam lines and glue marks can be harder to see during assembly than they would be on light gray plastic. Good lighting and a magnifying lamp are helpful when checking joint fit before the cement fully cures. The decal sheet provides authentic U.S. Air Force markings that apply cleanly over the dark surface, though a gloss clear coat before decal application will help prevent silvering.
When working with black-molded plastic, consider applying a thin coat of dark gray or gunmetal paint over the entire airframe before adding decals. This evens out any slight color variation between sprue trees and gives the decals a more uniform background. A final flat clear coat will seal everything and reduce the plastic sheen that can make a model look toy-like under bright display lighting.
This kit is a strong pick for Cold War aviation enthusiasts and anyone who appreciates the Blackbird’s unique silhouette. The relatively low parts count means you can focus your time on finishing quality rather than assembly logistics, and the bonus drone gives you a conversation piece that most SR-71 models do not include.
Builders looking for a quick weekend project, since the skill level 4 rating and finishing work required will extend the timeline beyond a single session.
We may earn a commission when you buy through this link, at no additional cost to you.
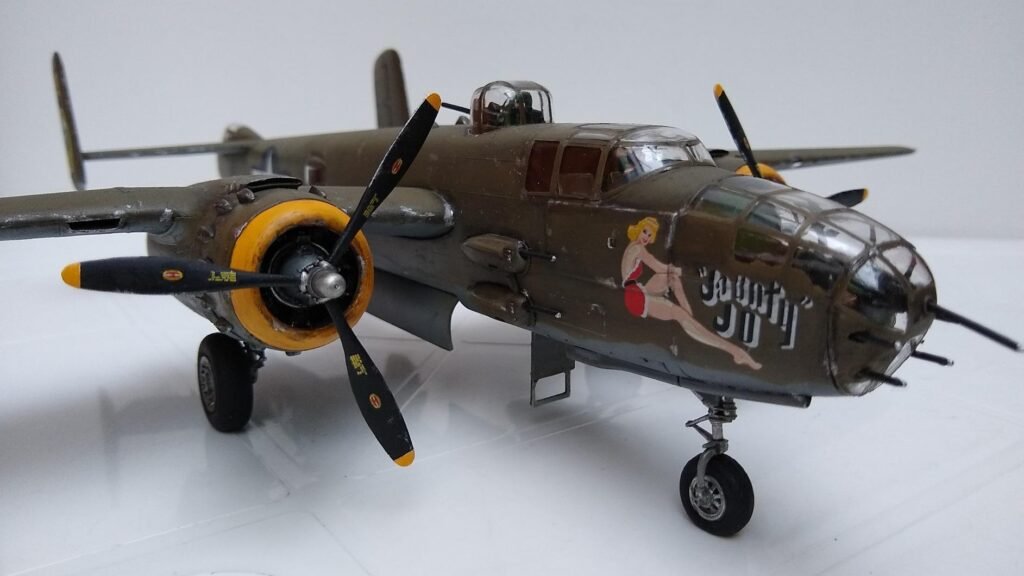
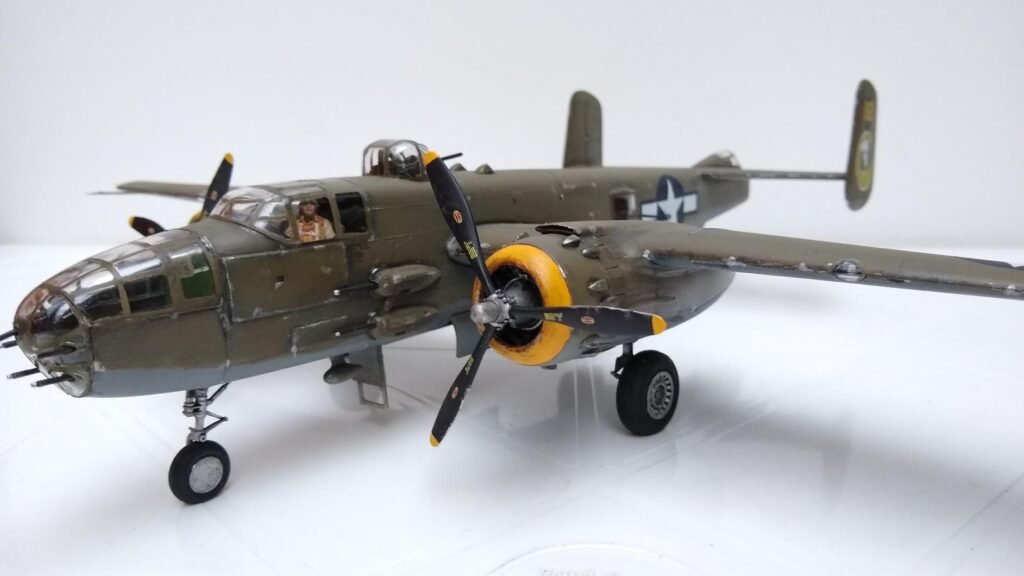
At 1:48 scale, the Revell B-25J Mitchell is the largest finished model you will get from any kit in this guide, stretching over 14 inches long with a wingspan approaching 17 inches. That substantial size gives the builder plenty of surface area for painting, weathering, and decal work, and it produces a display piece that commands attention on a shelf or in a display case. The 147-part count and skill level 4 rating place it firmly in the intermediate-to-advanced category.
We may earn a commission when you buy through this link, at no additional cost to you.
The kit includes several details that elevate it above a basic bomber replica. Crew figures add a sense of scale and narrative to the finished model, and the weighted tires give the landing gear a realistic sit on the ground rather than the slightly buoyant look that unweighted wheels can produce. The glass nose section houses machine gun barrels, which is one of the B-25J’s most distinctive visual features and a focal point of the build.
Decal options cover two aircraft from the 345th Bomb Group’s Air Apaches, giving you a meaningful choice in markings without requiring aftermarket sheets. The light gray molding is standard for aircraft kits and provides a neutral base that accepts both light and dark paint colors well. Plan your painting sequence around the clear nose and canopy parts, since masking these areas before spraying the fuselage will save you significant cleanup time later.
A 17-inch wingspan is larger than many builders anticipate, especially if you are used to 1:72-scale fighters. Measure your intended display area before you start gluing wings in place, and consider whether you will need a wall-mounted bracket or a dedicated shelf rather than a standard bookcase. Building the model on a temporary base or stand during construction also helps prevent accidental damage to the tail or wingtips while you work on other sections.
This kit is ideal for World War II aviation enthusiasts who have the display space to accommodate a large model and the patience for a multi-session build. The combination of size, detail, and historical significance makes the B-25J one of the most satisfying projects in the Revell catalog, and the finished model serves as a genuine centerpiece in any military aircraft collection.
Modelers with limited display space or those who prefer compact desktop-sized builds will find the B-25J’s footprint impractical.
We may earn a commission when you buy through this link, at no additional cost to you.
The AMT 1967 Chevy Impala occupies a unique niche in this guide as a screen-accurate replica of the car nicknamed Baby from the long-running television series Supernatural. Unlike generic muscle car kits that could represent any example of the model year, this release features newly tooled parts designed specifically to match the four-door demon hunter seen on screen. That level of specificity makes it a must-have for fans of the show and an interesting build even for modelers who are not familiar with the series.

We may earn a commission when you buy through this link, at no additional cost to you.
Detail accuracy extends to the Kansas license plates, aftermarket wheels, spotlights, bumper guards, and the column shifter that distinguishes the TV car from other Impala variants. The four-door body includes inner door panels, which is a detail that many 1:25-scale car kits omit in favor of a simpler one-piece interior tub. The parts are molded in black with chrome and clear plastic, and the black vinyl tires add a realistic touch to the finished stance.
At skill level 2, this kit is surprisingly approachable given the level of screen-accurate detail it delivers. The lower parts count and straightforward assembly sequence mean that a motivated beginner could complete the build in a few focused sessions, while experienced modelers can use the solid foundation as a starting point for additional weathering or interior detailing. The black molded body looks convincing as-is, though painting it a deeper gloss black will improve the finish under close inspection.
To match the show car’s well-used but cared-for appearance, consider applying a subtle satin clear coat over the black body rather than a high-gloss finish. A light dusting of matte brown or dark gray along the lower body panels and wheel wells can simulate the road grime that the Impala accumulated during its fictional cross-country journeys. Keep the chrome trim bright and clean to maintain the contrast that makes the TV car visually striking.
If you are a Supernatural fan looking for a tangible piece of the show, this kit delivers the most accurate representation available in plastic model form. Even without the pop-culture connection, the 1967 Impala is a handsome American sedan, and the four-door configuration sets it apart from the two-door muscle cars that dominate most model car lineups.
Builders who prefer traditional two-door hot rods or race cars may find the four-door sedan format less exciting to assemble.
We may earn a commission when you buy through this link, at no additional cost to you.
Tamiya has long been regarded as the benchmark for fit, engineering, and surface detail in plastic model aircraft, and the 1:48 F-16CJ Fighting Falcon lives up to that reputation. The kit accurately reproduces the F-16's distinctive blended wing-body shape and the CCIP-equipped cockpit avionics that distinguish the CJ variant from earlier F-16 models. The IFF antenna array in front of the cockpit is a small but telling detail that signals Tamiya's commitment to variant-specific accuracy.

We may earn a commission when you buy through this link, at no additional cost to you.
The ordnance load is comprehensive, including AGM-88 HARM anti-radiation missiles, AIM-120C AMRAAMs, AIM-9M/X Sidewinders, an ECM pod, and external fuel tanks. This gives you the option to build the jet in a clean air-superiority configuration or a fully loaded SEAD (Suppression of Enemy Air Defenses) loadout. The polycap joints on the centerline and inner wing pylons, as well as the tail assembly, allow you to detach weapons and stabilizers for storage or transport without risking damage to glued joints.
The moveable horizontal stabilizers and positionable flaperons add a layer of display flexibility that static kits cannot match. You can set the control surfaces in a neutral cruise position or deflect them to suggest a banking turn on a display stand. The included pilot figure can be equipped with either a standard flight helmet or a JHMCS helmet, and the cockpit detail is sharp enough to look convincing through the clear canopy without aftermarket additions.
With so many weapons and pods included, it can be tempting to hang everything on the airframe at once. However, a fully loaded F-16 can look visually cluttered and may not reflect a realistic mission profile. Research reference photos of actual F-16CJ loadouts from the 5th Air Force or other operational units to choose a configuration that is both visually balanced and historically plausible. The polycap joints make it easy to swap loadouts later if you change your mind.
This kit is the strongest overall choice in the guide for modelers who value engineering precision and want a modern jet that looks impressive both on the shelf and in close-up photography. The higher price reflects Tamiya’s tooling quality and the breadth of included ordnance, but the result is a build that requires less filler, less sanding, and less frustration than many competing kits at lower price points.
Builders on a tight budget who prioritize quantity of kits over per-kit quality may prefer a less expensive 1:72-scale alternative.
We may earn a commission when you buy through this link, at no additional cost to you.
Selecting a plastic model kit involves more than picking a subject you like. Scale, skill level, parts count, assembly method, and finishing requirements all shape the building experience and the final result. This section walks through the most important decision factors so you can match a kit to your skills, schedule, and display goals.
Scale determines how large the completed model will be and how much surface detail the manufacturer can realistically include. Common aircraft scales include 1:72, 1:48, and 1:32, with 1:72 producing compact models suitable for desk display and 1:48 offering a larger canvas for painting and weathering. Car kits are most often produced in 1:25 or 1:24 scale, which yields finished models roughly 7 to 9 inches long depending on the subject vehicle.
The practical implication of scale goes beyond aesthetics. Larger models require more display space, more paint, more decals, and more time to complete. A 1:48 bomber like the B-25J Mitchell in this guide will dominate a shelf with its 17-inch wingspan, while a 1:72 fighter like the SR-71 Blackbird fits comfortably on a bookcase ledge. Before committing to a large-scale kit, measure your intended display area and consider whether you will need a dedicated stand or wall mount.
If you are unsure which scale to start with, 1:72 for aircraft and 1:25 for cars are the most widely supported scales in terms of aftermarket parts, reference materials, and community advice. These scales strike a good balance between detail and manageability for most builders.
Most major kit manufacturers assign a skill level rating to their products, typically on a scale of 1 to 5. Level 1 and 2 kits are designed for beginners and younger builders, with fewer parts, simpler assembly sequences, and sometimes snap-fit construction that eliminates the need for glue. Level 4 and 5 kits assume familiarity with cement application, painting, decal work, and multi-step sub-assemblies. The parts count generally correlates with skill level, though some kits achieve high detail with clever engineering rather than sheer part numbers.
A higher parts count does not automatically mean a better kit. Some 200-part kits include dozens of tiny pieces that add marginal visual improvement but significantly increase assembly time and frustration. Conversely, a well-engineered 66-part kit like the Revell SR-71 can produce a highly detailed result because each part is precisely molded and fits together cleanly. Pay more attention to the skill level rating and builder reviews than to the raw parts number.
Be honest about your current skill level when choosing a kit. Starting with a project that is too complex is one of the most common reasons people abandon the hobby. A satisfying skill-level-2 build will do more for your confidence and enjoyment than a half-finished skill-level-5 kit sitting in a box.
Traditional plastic model kits require polystyrene cement or liquid glue to bond parts together. This method produces the strongest joints and allows for seam filling, sanding, and other finishing techniques that create a seamless appearance. Glued construction also gives you the flexibility to modify parts, correct alignment errors, and add aftermarket detail pieces. The tradeoff is that glue work requires ventilation, drying time, and a degree of practice to avoid visible glue marks on finished surfaces.
Snap-fit kits like the SEBUNAS A-10 Thunderbolt II use precision-engineered joints that click together without adhesive. This approach is faster, cleaner, and more accessible for younger builders or anyone who wants a finished model in a single session. The downside is that snap-fit joints can leave visible seam lines, and the parts are generally not compatible with conventional model cement or standard painting techniques. ABS plastic, which is common in snap-fit kits, is more durable but less customizable than polystyrene.
Choose snap-fit if your priority is a quick, low-mess build or a gift for a younger builder. Choose glued construction if you want to develop traditional modeling skills, practice painting and weathering, or achieve a competition-quality finish.
The most important factor in choosing a model kit is whether you genuinely care about the subject. A builder who is passionate about World War II aviation will pour hours of careful attention into a B-25J Mitchell that a car enthusiast would find tedious, and vice versa. The hobby rewards patience and attention to detail, and both of those qualities are much easier to sustain when you are excited about the finished result.
Subject matter also influences the availability of reference materials, aftermarket parts, and community support. Popular subjects like the F-16, the 1967 Impala, and the SR-71 Blackbird have extensive photographic references, dedicated online forums, and a wide range of aftermarket decal sheets and detail sets. More obscure subjects may require you to do your own research and work with the kit as it comes out of the box.
If you are new to the hobby and unsure what subject to start with, consider what you already enjoy in real life. Classic car fans should gravitate toward 1:25-scale automotive kits, while military history enthusiasts will find the most satisfaction in aircraft or armor subjects. Building something you already love makes the learning curve feel like exploration rather than homework.
Most traditional plastic model kits are molded in a single color or a limited palette of gray, white, black, or clear plastic. This means the builder is responsible for painting the model to match the real subject, which can range from a simple single-color spray to a complex multi-tone camouflage scheme with weathering effects. Paint and glue are almost never included in the box, so factor in the cost of basic supplies when budgeting for your first few builds.
Some kits, like the MPC Pontiac GTO molded in blue or the AMT Impala molded in black, come in a color that approximates the finished appearance. These pre-colored kits can be displayed without painting if you are satisfied with the molded hue, though a clear coat will improve the finish and protect the plastic from UV yellowing over time. Snap-fit kits like the SEBUNAS A-10 often include a pre-applied paint scheme, which eliminates the painting step entirely.
If painting feels intimidating, start with a pre-colored or snap-fit kit and add painting to your workflow gradually. A simple flat clear coat over a pre-colored body is a low-risk way to practice with an airbrush or spray can before attempting full color changes or camouflage patterns.
Kit manufacturers vary significantly in tooling precision, parts fit, and instruction clarity. Tamiya is widely considered the gold standard for fit and engineering, with parts that snap together so precisely that some builders complete entire models with minimal glue. Revell offers a broad catalog spanning decades of tooling, which means quality can vary between newer releases and older kits that have been reissued from legacy molds. AMT and MPC occupy a similar position, with some excellent recent toolings alongside older kits that may require more filler and adjustment.
Tooling quality directly affects your building experience. Well-tooled parts fit together cleanly, preserve fine surface detail, and minimize the need for gap-filling putty or extensive sanding. Poorly tooled parts can lead to misaligned panels, thick sprue gates that leave visible marks, and sink marks on flat surfaces. Reading builder reviews and checking the tooling date on a kit can help you avoid frustrating builds.
When in doubt, prioritize newer toolings from established brands. A recently tooled Tamiya or Revell kit will almost always provide a smoother building experience than a decades-old reissue, even if the subject matter is similar.
Before you start building, think about where the finished model will live. Large aircraft kits with wide wingspans may not fit on standard bookshelves and could require wall-mounted brackets or glass display cases. Car models are generally more compact but benefit from dust-free enclosures to protect delicate chrome trim and photo-etched parts. Consider whether you will display the model on a stand, in a diorama, or on a simple shelf, and plan your finishing approach accordingly.
Storage during the build process is equally important. A partially completed model with wet glue or fresh paint is vulnerable to dust, pet hair, and accidental bumps. Having a dedicated building area with a cover or a large plastic storage bin to protect the model between sessions will save you from heartbreaking damage to nearly finished work. Kits with polycap joints, like the Tamiya F-16, offer the additional advantage of detachable wings and ordnance for easier storage and transport.
Measure your display space before purchasing large-scale kits, and invest in a simple dust cover or display case early in the hobby. Protecting your finished work is just as important as building it well.
Before you begin assembly, read the instruction sheet all the way through to understand the full build sequence and identify any steps that require advance preparation, such as painting interior components before closing up a fuselage or car body. Lay out all sprue trees and compare them to the parts list to make sure nothing is missing. Use sharp hobby nippers to cut parts from the runners, leaving a small amount of excess material that you can trim flush with a craft knife or fine file afterward. Rushing the sprue cuts is one of the most common causes of damaged parts and visible gate marks on finished surfaces.
When applying glue, use the minimum amount necessary to create a strong bond. Excess cement can melt surrounding detail, create visible seams, and fog clear canopy parts. For small joints, a toothpick or fine-tipped applicator bottle gives you much better control than squeezing directly from the tube. Allow each sub-assembly to cure fully before moving on to the next step, and resist the temptation to handle freshly glued parts to check alignment. Patience during assembly pays off in a cleaner, more professional-looking finished model.
To preserve your completed model, keep it out of direct sunlight, which can yellow clear parts and fade paint over time. Dust the model gently with a soft makeup brush or a can of compressed air held at a distance to avoid dislodging small antennas, pitot tubes, or decal details. If you need to store the model long-term, wrap it loosely in acid-free tissue paper and place it in a sturdy box with padding around the wings, mirrors, or other protruding parts. Avoid plastic bags, which can trap moisture and cause paint to soften or decals to lift.
At a minimum, you will need hobby nippers or side cutters for removing parts from sprue trees, a craft knife for trimming gate marks, and fine-grit sanding sticks or files for smoothing seams. Glued kits also require polystyrene cement or liquid model glue. A pair of tweezers is extremely helpful for handling small decals and photo-etched parts. As your skills develop, you may want to add a pin vise for drilling, a glass file for canopy work, and an airbrush for painting.
Skill level 2 kits are designed for beginners and typically feature fewer parts, simpler assembly sequences, and sometimes pre-colored or snap-fit construction. Skill level 5 kits are intended for experienced modelers and may include hundreds of parts, delicate photo-etched components, complex multi-step sub-assemblies, and detailed painting instructions. The jump between levels is significant, so it is best to progress gradually rather than jumping straight to the most complex kit available.
Most traditional kits are molded in neutral colors like gray, white, or black and are designed to be painted by the builder. However, some kits come pre-colored or include a paint scheme that looks acceptable without additional finishing. Snap-fit kits often feature pre-applied colors and decals. If you choose not to paint, a clear coat spray will still improve the appearance and protect the plastic from UV damage and fingerprints.
Polystyrene cement is the standard adhesive for traditional plastic model kits. It works by slightly melting the plastic surfaces to create a welded bond. Liquid-style cements with a fine applicator brush are ideal for small parts and tight joints, while tube-style cements work well for larger assemblies. Avoid super glue (cyanoacrylate) on clear parts, as it can cause fogging. For snap-fit ABS kits, standard polystyrene cement may not bond effectively, so check the manufacturer's recommendations.
Build time varies enormously depending on the kit's complexity and your experience level. A simple snap-fit kit with 43 parts can be completed in a single afternoon, while a 200-plus-piece skill-level-5 kit may take several weeks of evening sessions. Painting, decal application, and weathering can add significant time beyond the basic assembly. Plan your project around your available schedule rather than rushing to finish, since most mistakes happen when builders try to complete too many steps in one sitting.
For aircraft, 1:72 scale is the most beginner-friendly because the models are compact, the parts counts are manageable, and the finished size fits easily on a desk or shelf. For cars, 1:25 scale is the most common and widely supported. Starting with a smaller scale lets you complete builds more quickly and build confidence before moving up to larger, more detailed kits in 1:48 or 1:32 scale.
Yes, but the appropriate age depends on the kit's skill level and construction method. Snap-fit kits with low parts counts are suitable for children as young as 8 with adult supervision. Glued kits with small parts and sharp tools are generally recommended for ages 12 to 14 and up. Always check the manufacturer's age recommendation on the box, and supervise younger builders when they are using craft knives, glue, or spray paint.
Silvering occurs when tiny air bubbles get trapped under the decal film, creating a silvery appearance against the painted surface. To prevent it, apply a gloss clear coat to the model before placing decals, since smooth glossy surfaces allow the decal to settle more evenly. Use a decal setting solution to help the decal conform to panel lines and curved surfaces, and gently press out air bubbles with a cotton swab or soft brush. Seal the decals with another clear coat once they are fully dry.
Revell and Tamiya kits are not designed to be mixed, since they use different scales, engineering approaches, and sometimes different plastic formulations. However, the tools, paints, glues, and finishing techniques you use on one brand will generally work on the other. Aftermarket detail sets and decals are typically scale-specific rather than brand-specific, so a 1:48 decal sheet designed for an F-16 will fit both a Tamiya and a Revell 1:48 F-16 kit, though minor trimming may be needed.
The Tamiya 1:48 F-16CJ stands out as the strongest overall kit in this guide, combining exceptional engineering precision, a comprehensive weapons loadout, and three detailed marking schemes into a build that rewards careful attention at every stage. Its polycap joints and moveable control surfaces add practical display flexibility that few competing kits can match, and the finished model looks impressive whether displayed clean or fully loaded.
For builders with different priorities, the SEBUNAS A-10 Warthog offers a fast, glue-free introduction to aircraft modeling at a very accessible price, while the MPC 1967 Pontiac GTO provides a satisfying classic car build that does not overwhelm newer modelers. The Revell SR-71 Blackbird and B-25J Mitchell cater to military aviation enthusiasts who want iconic subjects with strong historical detail, and the AMT 1967 Impala brings a unique pop-culture angle that will appeal to fans of the Supernatural series.
The best plastic model kit for you is the one that matches your current skill level, fits your display space, and excites you enough to see the project through to completion. Start with a subject you love, choose a skill level that challenges you without frustrating you, and invest in a few basic tools before you begin. The hobby rewards patience and curiosity, and every completed build teaches you something new for the next one.